Vivian J. Zabrocki
Academic Learning and Support Specialist
Academic
Support Center
Montana State University - Billings
1500 University Drive
Billings, MT 59101
phone: 406-657-2096
fax: 406-657-1658
Let
Me Show You How:
Graphing Calculators Online
Teaching
students to use a graphing calculator online is difficult.
With written directions, students often struggle to get the desired
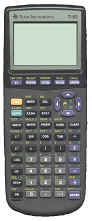
results. Using the Texas
Instruments screen capture, students can see the results of a calculation
but are often confused by the keystrokes used to make the calculation.
Now, the keystrokes can be shown by combining the Virtual TI and
Camtasia video screen capture.
The
Virtual TI (VTI, for short) is a software program that translates the
instructions for the calculator into instructions the computer can
execute. The free VTI that I
used was written by Rusty Wagner, and it will emulate all the major TI
graphing calculators: TI-82,
TI-83, TI-83 Plus, TI-85, TI-86, TI-89, TI-92, TI-92 II, and TI-92 Plus.
A clickable calculator skin is available for each model calculator.
When the associated ROM is copied to the same folder as the VTI,
the user can click the buttons on the computer and perform any of the
calculations done on a regular calculator.
The VTI can be downloaded from the ticalc.org website (http://www.ticalc.org/archives/files/fileinfo/84/8442.html).
The
VTI is useless without a ROM (Read Only Memory) image which contains the
program that is used to operate the calculator.
This ROM must be downloaded from the calculator.
Directions for downloading a ROM image are given on the ticalc.org
website (http://www.ticalc.org/programming/emulators/).
Several useful websites for information on virtual calculators and
downloading ROM images exist:
http://www.technoplaza.net/programming/index.cgi?p=vti
http://www.geocities.com/TI_ROMS/
http://epsstore.ti.com/webs/DeptHome.asp?deptid=157&breakdown=Y
Once the Virtual TI is installed
and working properly, Camtasia can be used to create videos that capture
all of the keystrokes needed to perform a calculation.
Camtasia by TechSmith (http://www.techsmith.com/products/camtasia/camtasia.asp)
creates videos of onscreen activity from any application so people can see
how to use the software. Narration
can be added to explain the steps being executed.
Once the video has been recorded, it can be edited.
Videos can be spliced together with or without transitions and any
unwanted frames can be removed. The
final product can be exported in several formats:
Real Media, Windows Media, QuickTime and AVI.
The original .avi files are compressed using video codecs to reduce
the file size. Unlike most
other codecs, the Camtasia codec (TSCC) is lossless, meaning that its
compression technology does not lose any quality whatsoever when the video
is compressed. When played, videos compressed with TSCC will look exactly
like the screen that was recorded.
I have created videos showing how to graph functions; how to set the viewing window; how to solve linear equations, linear inequalities, absolute value inequalities, and three part inequalities; how to solve systems of equations using matrices; how to find the zeros, local maxima, local minima and intercepts of a function; how to create scatter diagrams and find the line of best fit for several calculator models. I use these in my online College Algebra class. Some of these can be seen on our website at the Academic Support Center (http://www.msubillings.edu/asc/ti89.htm). Our campus does not have a streaming media server so I have given students two choices. They can view the poorer quality RealMedia videos directly from the Internet or they can download the clearer Camtasia videos to the hard drive and then play them in RealPlayer. They will be prompted to download the Camtasia plug-in the first time they play a Camtasia video.
Here is a sample video. Click on the RealMedia link to view the video using the RealMedia codec. To see the difference using the Camtasia codec, click on the Camtasia Video link.
| Creating a Scatter Diagram | |